SOLAR POWER
Further down the page we list the factory recommended options for Solar for various Sargent units.
However, in practice so many of the Sargent units are mounted so far from the batteries that voltage drop is able to drastically affect the charging capabilities.
There is also growing evidence that the Sargent Solar Controller is low efficiency, has poor voltage control with reliability issues. The Solar controller inside the Sargent can be swapped in place with a better unit to overcome some of the issues, like poor voltage control, etc. but the voltage drop issue can still be significant.
For an explanation of voltage drop see point 2. on our Solar Power pages.
We now believe that the best Solar approach is to wire these units using the Votronic Dual Battery Solar Regulator direct to the batteries and bypass the limitations of the Sargent unit. We have seen a 50% improvement in the overall charge rate by using the suggested Votronic option. The one exception is the EC325 where the Mains charger can output up to 18v, see below.
Issues to consider :
A). 120W is the maximum solar panel size the Sargent ECxxx units will support. Note that this is the limit the Sargent units, like the EC500 are designed for. The Copper tracks carrying the current from the Solar Regulator on the PCB are very light duty. If you want a Solar array bigger than 120w you have no option but to go straight to the batteries.
B). All decent Solar regulator manufacturers say to mount the Regulator within one metre of the main habitation battery to ensure maximum charge rate, but many Sargent units (where the Solar regulator will be) are located several metres from the Batteries, resulting in significant voltage drop and reduced charge rate. Unless the Sargent ECxxx unit is right next to the batteries, we would advise not using Solar through the ECxxx but direct to the battery.
C). In order to utilise charging of the Starter batteries some Sargent units must be left powered on to enable Smart charging to work correctly. However when in this mode some of the boxes can draw up to 0.25amps, which in mid winter is equivalent to 6Ah a day when the total Solar harvest might only be 5Ah for an entire day. By wiring a dual battery Votronic MPP Solar regulator direct to the batteries, there is no need have the Sargent ECxxx box powered up, the entire system can be shutdown and both batteries will still be charged.
D). The Votronic Solar regulator is specifically designed for motorhomes and has a low long term Float voltage of 13.4v which will prolong the life of the batteries, particularly the Starter battery. Yet it also makes up the most powerful charging combination of any Solar Regulator we have tested.
E). The Sargent 'Smart' charging feature isn't as good as it might be as it waits until the Starter battery drops below 12.4v before it starts charging. Clearly there is then going to be an uphill struggle to charge a modern batteries to 12.8v - 13.0v from 12.3v in mid winter when a 100w Solar set-up will only be able to provide about 5Ah a day. See note below on Smart charging.
F). The Votronic dynamically adjusts the Solar Power Split between the batteries and is able to give 100% to the Starter battery, such as in mid winter when the drain of an Alarm, Tracker, etc can be a far bigger consumer of power when the habitation battery has zero drain. It does this more efficiently than any Sargent ECxxx.
Smart Charging works differently significantly on different ECxxx models.
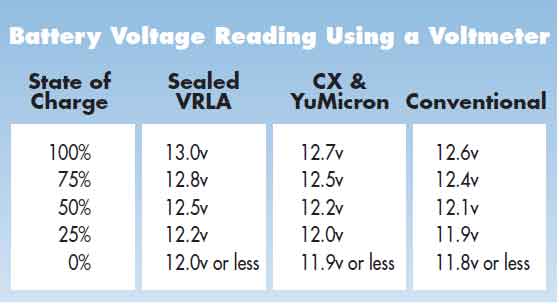
Further to our comment on Smart charging above, Solar charging of the Starter battery only takes place once the Starter battery has dropped below12.4v, i.e to 12.3v when 12.3v is a might be greater than 50% discharged battery. That is not ideal for a battery to slowly discharge to that level over weeks or months.
If you look at the document below, you will see how discharged a modern battery is at 12.3v is and that assumes the ECxxx unit has an accurate voltage sensor.
One other point, note how the EC4xx range when Solar charging defaults to always charging the Starter battery, not the Habitation area battery which is the opposite of the EC500 which defaults to the Habitation battery each time...
We publish the factory Solar options below but suggest that you don't use the Sargent Solar Controller but utilise a Votronic MPP Solar Regulator connected directly to both batteries, see our Solar Pages.
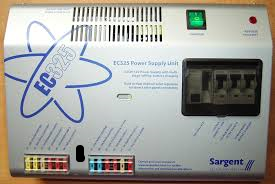
EC225/PSU 2007
The photo below is the e cable supplied by Sargent to plug a Solar regulator into the EC225. It costs just £21 and takes minutes to wire up to the Solar Regulator and then just plugs into the EC225.
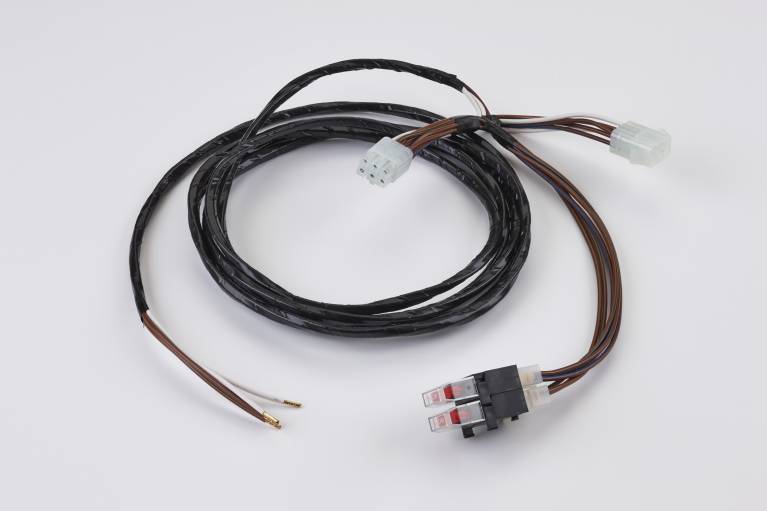
The above cable not only simplifies installation, but the EC225 will be able to route the Solar Regulator charge to both the Habitation battery and the Starter battery. All Solar charging is also displayed on the existing EC225 display.
The Solar regulator does not need to be anything special either, but obviously something like a Votronic is still recommended.
SOLAR POWER AND THE SARGENT EC325/EC328/EC500.
The Sargent EC328 and EC500 models have a specific Solar Panel Input that does not require a separate SOLAR REGULATOR making it very easy to wire up.
The EC325 PSU does not always incorporate a built-in Solar Regulator but the output of an external solar regulator connects directly to the EC 325 connection of up to 200W solar panel. This works with the EC325 Smart Charging function
On the EC328 and EC500 the built in Solar Regulator charges both the Starter and Habitation batteries and connects to the PSU via a dedicated 4 pin connector on the lower underside. See photo below for plug location.
The cable costs just £13 from Sargent :
https://sargentltd.co.uk/shop/product/EC328solarlead/126On most of the newer EC units, only a Solar panel and the Sargent cable are required, with one end of the cable connecting to the Solar Panel (via a fuse) and the other end plugging into the EC xxx box. See the Sargent links above for details.
When wired this way All the Solar Power charging Volts and Amps will then be shown on the existing Sargent LCD display, without any additional parts/wiring.
It simplifies Solar Panel installation making the Interior connections almost 'Plug and Go' cutting down installation time by hours. That is a major saving on the fitters time and no need to buy a separate Solar Regulator, no Battery Master, no complex wiring to go wrong, etc.
You should not connect any device direct to the battery on the EC325.
The Sargent EC325 unit has a very sophisticated mains charger. If 240v is connected and the battery is low it will 'isolate' the battery from the Motorhome and switch a small 12v power supply into it's place to keep things ticking over.
It will then 'super charge' the battery at up to 18v and 25amps. Anything connected directly to the battery will get hit with these higher volts.
A Battery Master style unit should not be fitted, for obvious reasons.

|
Sargent EC200 wiring diagram.pdf Size : 274.926 Kb Type : pdf |
|
|
ec325.pdf Size : 1194.013 Kb Type : pdf |
|
|
Sargent EC500 Issue 2.pdf Size : 4963.306 Kb Type : pdf |
